How to Repair Mold-Damaged Drywall
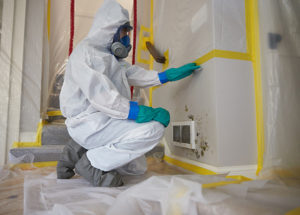
Repairing mold-damaged drywall isn’t difficult, but correcting the explanation for the mold can often be challenging. Roof leaks, an improperly installed vapor barrier, leaky pipes, or constant contact with water from sinks, tubs, and showers can cause mold damage. Mold happens whenever moisture is consistently present. Mold spores attach to the paper facing of the drywall, the paper becomes a food source, and therefore the mold colony propagates and grows. Long-term exposure to mold spores are often harmful, especially if an individual is allergic to mold. you ought to consider consulting a mold removal specialist to work out the sort of mold that’s present, and you ought to always wear a mask and gloves when working with mold.
Remove Mold-Damaged Drywall
1.Mark the Mold-Damaged drywall with a pencil after you identify the world of drywall you would like to get rid of . Use a straightedge to mark lines vertically and horizontally on the face of the drywall. Whenever possible, have the lines go over the centers of the framing members behind the drywall; this may provide backing and a fastening surface for the drywall patch.
2.Confirm that there are not any electrical or plumbing runs within the wall behind the marked cutout, then cut out the damaged drywall section with a handsaw . Wherever a cutting line intersects with a stud or a joist behind the damaged drywall, saw through the drywall at a shallower angle cutting the drywall until you reach the surface of the wood.
3.Cut into the vertex of corners with a razor knife. Make corner cuts wherever the section of drywall you’re removing is attached to an indoor corner. Cutting the corners reduces damage to adjacent walls or ceilings as you remove the damaged drywall.
4.Make a hole within the damaged drywall with a hammer. Grasp the drywall together with your gloved fingers inside the opening , and pull the damaged drywall faraway from the wall. Remove the whole area of damaged drywall one piece at a time. Take some time and minimize any damage to the drywall adjacent to the section you’re removing.
5.Remove all of the drywall from the wall if the incorrect sort of drywall was initially installed. On rare occasions, mold damage results from using the incorrect sort of drywall for a specific application. the 2 commonest causes of mold damage, not created by water leaks, are drywall installed behind tile, or regular drywall installed during a bathroom rather than mold resistant drywall.
6.Remove any drywall nails or screws from the facing of the studs or framing. Often the fasteners will remain within the wood after you remove damaged drywall.
Repair the Leak
1. Locate and repair the source of the leak. The source of the matter is typically apparent once you remove the drywall and expose the framing. If the leak source isn’t easily determined, consult a licensed contractor before you replace the drywall. you want to repair the explanation for the leak or mold and mildew will eventually reform over the new drywall. An unresolved leak can also create additional damage to framing, insulation, siding and flooring.
2. Check the exposed framing for dry rot. Dry rot may be a mycosis of the wood framing members. If dry rot is present, remove and replace the affected framing. Remove and replace any wet insulation.
3. Clean mold off of framing members with a 1-to-8 ratio bleach and water solution. Use a scrubbing brush or a scrubbing pad, wear gloves, goggles and a respirator as you clean. Thoroughly dry the whole exposed area.
4. Paint the exposed framing with zinc oxychloride liquid, or ZOC. ZOC inhibits mold, mildew and fungi growth. Use a 2-inch disposable paintbrush to use the ZOC, then throw it away once you are finished. don’t attempt to clean and reuse the comb . Wear gloves, goggles and a respirator when working with ZOC.
Install New Drywall
1.Measure the length and width of the world needing drywall replacement. Use a tape to get the measurements and transfer them to the front face of a replacement drywall sheet. Mark lines for the required cuts on the drywall face employing a pencil and a 4-foot straight edge.
2. Cut through the paper facing of the drywall sheet with a razor knife. Cut along the drawn lines. Break the drywall along the face cut, and fold the drywall slightly to form a crease within the paper backing of the drywall sheet. traverse the crease within the backing paper with a razor knife from the backside of the drywall sheet, and take away the unwanted portion of drywall. to form cuts that are perpendicular to every other, use a handsaw for the shorter of the 2 cuts, then fold and cut the drywall.
3.Position the drywall section within the opening, and use a helper to carry the new drywall in situ . Install fasteners through the drywall into the wall or ceiling framing. you’ll use drywall nails or drywall screws. Screws are better because they cause much less damage to the interior structure of the drywall sheet during installation. Install fasteners every 9 inches on the perimeter, and each 12 inches within the field. If necessary, use a bit of plywood or one-by lumber for a backing and fastening surface behind any drywall edges that do not go over framing.
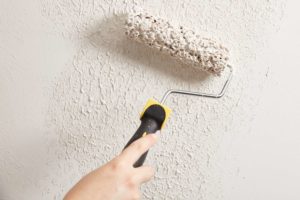
4.Tape and finish the replacement area to match the prevailing texture, then paint the wall or ceiling to finish the project
Contact us now for all Mold-Damaged Drywall.